Technology

How Many Weight Watchers Points Is Maruchan Instant Lunch

How Many Weight Watchers Points Is Maruchan Instant Lunch

Cherry Tomato Soup

A bowl of tomato soup garnished with tomatoes and herbs.

Image Credit: Eising/Photodisc/Getty Images

Low-fat and low-calorie canned soups are ideal for the Weight Watchers PointsPlus weight-loss program and are produced by several companies, including Progresso, Campbell's and Healthy Choice. Soup's versatility makes it an effective choice for complimenting a main dish, serving as a meal's entree or, best of all, staying on the Weight Watchers diet. Even soups that are not marketed to the health conscious are good options and can help you keep on your path to weight loss.

Progresso

Progresso offers a variety of canned soups as part of its line of light soups, including Homestyle Vegetable and Rice, Zesty Southwestern-Style Vegetable and Italian-Style Meatball with Penne. Each can comes with two 8 ounce servings that are worth one or two Weight Watchers PointsPlus points. Most of these soups are high in fiber, low in sodium and are less than 100 calories per serving. While a two- or four-point can of soup might not take care of the hunger you've built up, perhaps one of Progresso's normal canned soups will do the trick without expending your daily allotted points. For example, the company's Rich and Hearty Steak and Vegetables soup offers two 8 ounce servings and will only cost you six points per can. Progresso is the only soup endorsed by Weight Watchers.

Campbell's

Campbell's line of Select Harvest canned soups are another good selection while on the Weight Watchers program. Select Harvest soups are available in many flavors, including Italian-Style Wedding Soup, Chicken with Egg Noodles Soup and New England Clam Chowder. All of the Select Harvest flavors are made from natural ingredients and are low in calories and fat. For example, a can of Select Harvest Italian-Style Wedding Soup yields two 8 ounce servings at three points per serving. Several of the Select Harvest offerings are designated as "light" and are worth even fewer points.

Healthy Choice

Healthy Choice soups are available in microwavable bowls or regular cans and come in an assortment of flavors, including Fiesta Chicken, Zesty Gumbo and Steak and Noodle. Each flavor is low in fat and calories and is ideal for use on the Weight Watchers PointsPlus program. For example, the Zesty Gumbo soup offers two 8 ounce servings at a cost of two points per serving. Some selections, such as the Split Pea and Ham, are higher point choices and can cost up to four points per serving.

Lipton

Though technically not a canned soup, Lipton's Cup-a-Soup line of soups are another brand of instant soups that's compatible with Weight Watchers. At the time of publication, Cup-a-Soup is available in Tomato, Chicken Noodle, Cream of Chicken, Hearty Chicken Noodle and Spring Vegetable flavors. While this brand of soup does not provide a lot of fiber, its low-fat and low-calorie features keep them low in points. For example, one envelope of the Spring Vegetable soup, when mixed with water, is worth one Weight Watchers point.

How Many Weight Watchers Points Is Maruchan Instant Lunch

Source: https://www.livestrong.com/article/529743-good-canned-soup-for-the-weight-watchers-diet/

Bathroom Mould Paint

Bathroom Mould Paint

When it comes to anti mould paint it is not uncommon to have a few reservations. The first main reservation is whether or not it works and the second is a question of safety.

Many people hear a term like biocide and are dissuaded because of the inherently artificial and dangerous connotations such a word brings to mind. And, even though anti mould paints do include biocides they are as easy to apply and as safe to use as regular emulsion paint.

In this guide we'll look at exactly what ingredients you'll find in anti mould paints, look at their possible side effects and discuss what results you can expect in terms of their effectiveness.

  • 1) What is in Anti Mould Paint and is it Safe?
  • 2) But What Are They? And, How Do They Work?
    • 2.1) 1) Microbicide
    • 2.2) 2) Fungicides
    • 2.3) Are These Components Dangerous?
    • 2.4) Should I Be Worried?
  • 3) Does Anti Mould Paint Work?
  • 4) Recommended Anti-Mould Paint
  • 5) Is Anti Mould Paint The Same as Anti Condensation Paint?
  • 6) Can You Wallpaper Over Anti Mould Paint?
  • 7) Can You Paint Over Mould With Anti-Mould Paints?
    • 7.1) 1) Mould is Not a Stain
    • 7.2) 2) Your Paint Surface Isn't Ideal
    • 7.3) 3) Only Fungistatic
    • 7.4) 4) You Might Be Covering a More Severe Problem
  • 8) How to Prevent Mould Coming Back
  • 9) Conclusion
  • 10) This Weeks Most Popular Anti-Mould Paint

What is in Anti Mould Paint and is it Safe?

Whilst the ingredients vary somewhat from manufacturer to manufacturer one of the most commonly used mould fighting ingredients is a chemical called benzisothiazolone.

This chemical features two modes of action that makes it the ideal choice for use in anti-mould paints; it is both a microbicide and a fungicide. These components might sound like they belong in farming products however they are used in a surprisingly wide range of products within the home.

But What Are They? And, How Do They Work?

1) Microbicide

In essence, microbicides are designed to target microbes such as bacteria and viruses to not only destroy them but also inhibit their growth.

In bathrooms, one of the most common bacteria a microbicide would eliminate is serratia marcescens. This pink bacteria breeds as patches of pink slime and usually grows on your shower curtain, bathroom ceiling and/or walls. You'll also often find it developing in the grout between your tiles.

2) Fungicides

As the name implies fungicides kill fungi and their spores. It is a type of biocidal chemical compound and is the component of benzisothiazolone that tackles black mould growth. It also helps prevent its growth thanks to its fungistatic, or mould growth-inhibiting, properties.

Are These Components Dangerous?

As with any chemical compound, certain sensible precautions should be taken and benzisothiazolone is only really dangerous if consumed.

However, it does have some known side effects and produces an allergic reaction in certain individuals. The effects can include irritation of the eyes and skin and the most severe of which is allergic contact dermatitis (ACD).

ACD is a form of dermatitis that occurs as an allergic response that occurs when an individual comes into contact with a substance and is very similar to irritant contact dermatitis. The symptoms can range from an irritating rash or red, sore skin to small blisters or thickening of the skin.

However, once contact with the allergen has been removed the symptoms generally begin to subside and will only re-present themselves if the allergen is introduced again.

Should I Be Worried?

The possible side-effects might seem like scary stuff. But, this only occurs in fringe cases and use of benzisothiazolone is very common within lots of products you'll find in the home.

It can be found in everything from detergents and stain removers to fabric softeners and inks. Not only this but you'll also find benzisothiazolone in paints which do not explicitly list any kind of anti-mould mechanism. In fact, you'll find it in around 20% of all emulsion paints.

As you can see, the chances are you've already come into contact with benzisothiazolone because of its widespread use within a number of products. The good news is it is used in such low quantities (usually 200-400 parts per million) that the level of exposure is so low it is insufficient to trigger an allergic response in virtually all people.

Does Anti Mould Paint Work?

Measuring the effectiveness of anti-mould paint is, in part, a management of your expectations.

Firstly, anti-mould paints do work and, in many cases, will keep mould firmly at bay. However, if your bathroom is regularly drenched in condensation from heavy showers every day and is not properly ventilated, or dried the effectiveness will decline, as expected.

Secondly, biocides degrade over time and won't remain effective forever. In response to this many manufacturers typically provide a 5-6 year guarantee on the effectiveness of the biocides within their products. This means, in order to remain effective, anti-mould paints must be reapplied every 5 years or so.

In short, you can expect mould paints to work, however, they are not a magic cure. And, if you keep your expectations inline with the results you can realistically expect you shouldn't be disappointed.

Recommended Anti-Mould Paint

Prices & information last updated on 2021-12-08

Is Anti Mould Paint The Same as Anti Condensation Paint?

The line between an anti-mould and anti-condensation paints is somewhat blurred. Many anti-mould paints feature some water repellent properties and conversely, some anti-condensation paints will be impregnated with a fungicide or biocide.

However, the effectiveness of each will vary. For example, Dulux's MouldTec paints feature some degree of water resistance in that it repels steam and some moisture. But, because it is water-based it won't be fully water-resistant.

Many 'true' anti-condensation paints are usually oil or latex-based. As such, they provide superior water resistance but are not so heavily targetted towards preventing mould growth.

Can You Wallpaper Over Anti Mould Paint?

This is a common question when it comes to anti-mould paints and whilst you can wallpaper over them it will obviously hinder the efficiency of the paint. You should also ensure the wallpaper you choose has some kind of fungicidal treatment.

It is worth noting that the wallpaper itself will absorb a level of moisture and keep this trapped against the wall for longer than water which deposits on a painted surface. This will increase the chances of mould growing. Generally, its a good idea not to wallpaper areas of your home that generate a lot of moisture such as your kitchen or bathroom.

Can You Paint Over Mould With Anti-Mould Paints?


Painting over mould might seem like the ideal quick fix. But, mould growth differs from stains and marks, which can be covered by paint, in several key ways.

1) Mould is Not a Stain

The first is that mould is a living organism. As such it is not static, it continues to grow. Mould will have no problem growing under and through your fresh coat of paint. Paint might cover it for a short time, but it does not deal with the root of the problem.

2) Your Paint Surface Isn't Ideal

Secondly, more severe mould growth is not flat and often has a slimy, bumpy surface. This will make it more difficult for the paint to not only adhere but also to dry evenly. The end result will look quite shoddy and not be hard-wearing.

3) Only Fungistatic

Thirdly; and, this is sometimes a point of confusion, many anti-mould paints are fungistatic (IE prevents fungus growth), but do not kill mould. In which case applying anti-mould paint will have no effect on the existing mould coverage.

4) You Might Be Covering a More Severe Problem

Lastly; you need to determine the source of the mould. In many cases, this is due to excess humidity within the home. However, it could be due to a structural defect, such as penetrating damp. In which case the core issue needs to be solved and no amount of paint will fix the problem.

How to Prevent Mould Coming Back

To truly deal with a humidity based mould problem you need to ensure your home does not provide the ideal conditions for its growth. Lack of airflow and high moisture build-up within the home are two of the main causes that need to be mitigated.

A lot of the time we are the cause of high humidity within our homes. And this becomes compounded during the winter when the moisture we create cooking, bathing, and even breathing becomes trapped within our homes. This condenses to leave moisture on our walls, ceilings and windows. Creating the ideal breeding conditions for bacteria and mould.

Fortunately, the remedies for this is quite easy and simply opening the bathroom window after showering, using the extractor fan in your kitchen or buying a dehumidifier will help remove the trapped moisture, improve airflow and help inhibit mould growth. (We cover these tips in more detail here.)

If you're unsure of the humidity within your home purchasing a cheap hygrometer will help you determine if there is a risk of mould growth. As a general rule, you should try to keep the relative humidity within your home at around the 50-55% mark. Any higher than 60% and mould can grow.

Conclusion

When anti-mould paint is used in conjunction with a few simple aeration tips mould will have a hard time growing in your home. It can be applied just like regular paint and costs about the same too.

So, if your bathroom ceiling or kitchen walls are beginning to show the telltale signs of black mould, anti-mould paint might just be the help you need.

This Weeks Most Popular Anti-Mould Paint

Prices & information last updated on 2021-12-08

Bathroom Mould Paint

Source: https://dehumidifierreviewshq.co.uk/guide-anti-mould-paint/

Handicap Bathroom Bars

Handicap Bathroom Bars

When it comes to turning your home into a safe environment to age in place, special consideration should be given to bathrooms.

Entering and exiting a slippery shower, standing or sitting in a bathtub, even washing up after a toilet break can all pose serious risks of injury for those over the age of 65. According to the Centers for Disease Control and Prevention, more than three million older Americans are taken to the emergency room every year for injuries from falls, 80 percent of which take place in bathrooms.

Bathroom grab bars are installed in every one of my aging-in-place bathroom remodels.

Safety grab bars in aging-in-place bathrooms are so important that I won't renovate a bathroom without adding at least one. The keys are putting grab bars in the right places around the bathroom and making sure they are installed correctly.

Grab bars are a top aging-in-place priority. In this Ultimate Guide to Bathroom Safety Bars for Aging in Place, I'll help you make your bathroom as safe as possible by covering everything you need to know about safety grab bars. We'll discuss:

  • Types of safety bars
  • Places to install safety bars
  • Suction cups vs. fixed safety bars
  • Material types and features
  • Installation Tips

Types of Safety Bars

Safety bars and grab bars help people maneuver around the bathroom safely. A slippery floor or wet tub increases the risk of falling, but a properly installed and conveniently located safety bar can save you from serious injury or even death.

While safety is the No. 1 concern when it comes to bathroom home modifications, those wishing to age in place don't have to sacrifice aesthetics for the utility of staying upright. Not only are there are a wide variety of safety bar types, finishes, and designs, they're also available in permanently affixed or suction-cup styles to accommodate different needs.

Permanently installed safety bars are anchored to the wall and should meet the grab bar requirements laid out by the Americans with Disabilities Act. Installed bars are meant to bear someone's full weight, while suction cup bars are intended to just provide assistance with balance.

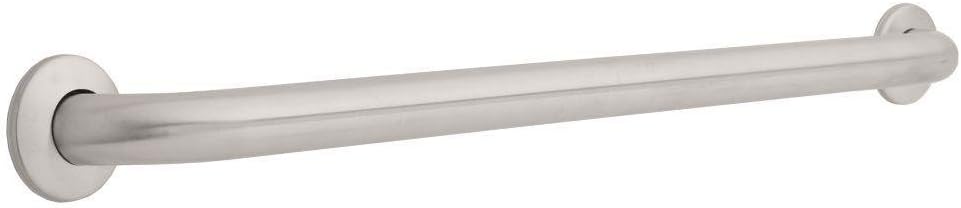
Straight Safety Bars

The most basic grab bar—straight bars—come in various lengths, materials, finishes and colors. As its name suggests, this type of grab bar is straight and can be installed anywhere in the bathroom. As long as it is installed directly into the wall, it offers excellent support, making it ideal for those with stability issues. Straight suction cup grab bars can also provide stability, but they are not meant to prevent a fall from happening or to serve as a pull bar after a fall. Suction cup grab bars are ideal for those who live in a condo or apartment where fixed installation isn't an option.

Recommended Safety Bars for Aging in Place:

Franklin Brass Grab Bar
This is a heavy-duty 32-inch long grab bar, longer than more common bars.

Sumnacon 12 Inch Bath Grab Bar with Anti-Slip Grip, Sturdy Stainless Steel Shower Safety Handle for Bathtub,Toilet, Bathroom,Kitchen,Stairway Handrail,Come with Mounted Screws
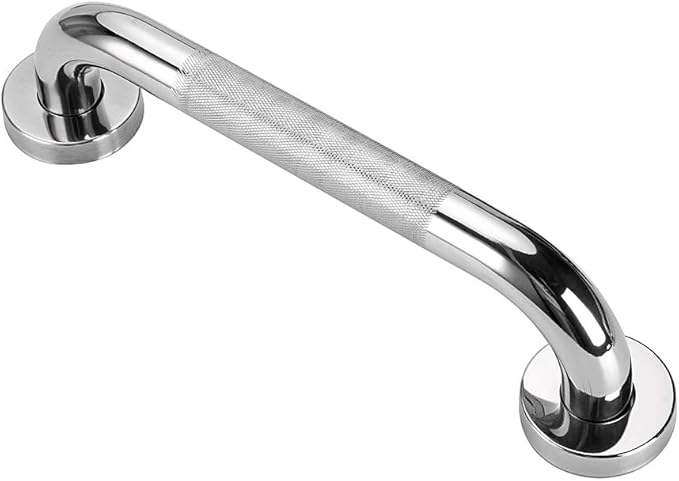
Sumnacon Anti-Slip Grip Grab Bar
This shorter grab bar has an anti-slip grip. It's perfect for placing vertically outside of a shower or tub for a hand when you're getting in and out.

Two-in-One Safety Bars

These safety bars offer stability support, but also serve other functional purposes, such as holding hand-towels or providing shelf space for soap or extra toilet paper. These combo units can be installed in locations where falls are more likely, but also where someone would naturally go to dry their hands or grab a facial tissue.

Recommended Two-in-One Safety Bar for Aging in Place:

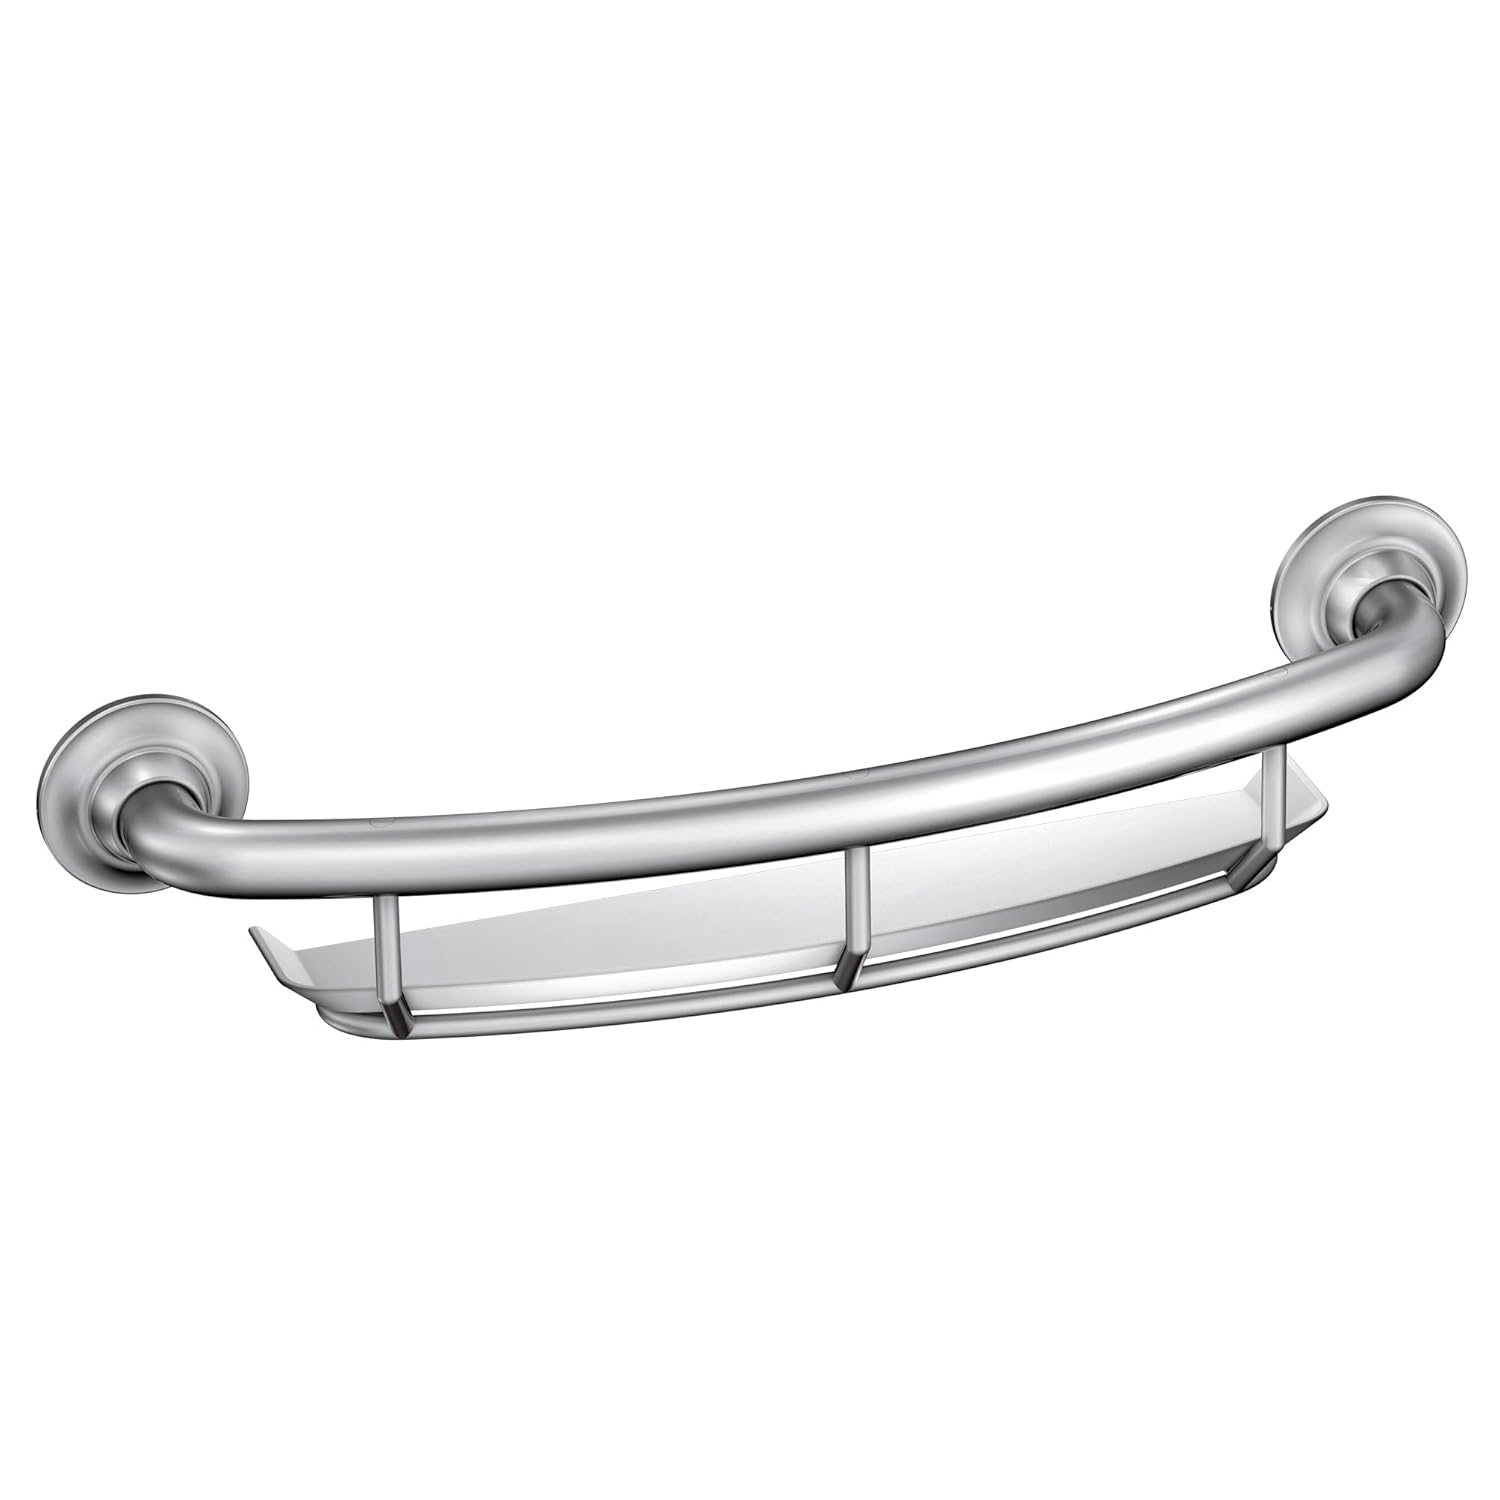
Moen Built-in Shelf Shower Safety Bar
This grab bar doubles as a shower caddy to hold shampoo and soap. It's right at arm level should you need it.

Wave and Curve Safety Bars

For those looking for the strength, stability, and safety of a straight grab bar without the institutional feel, wave and curve safety bars may be the answer. A variation of the straight safety bar, wave and curve safety bars feature a sleek design alternative that includes a slight curve or wave and are ADA compliant when properly mounted.

Recommended Wave and Curve Safety Bar for Aging in Place:

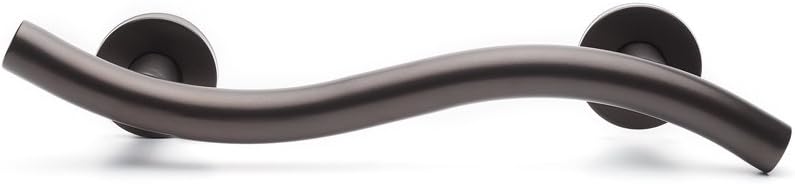
CSI Wave-Shaped Grab Bar
The shape of this grab bar with its rubbed bronze finish will make it double as a design element in your bathroom.
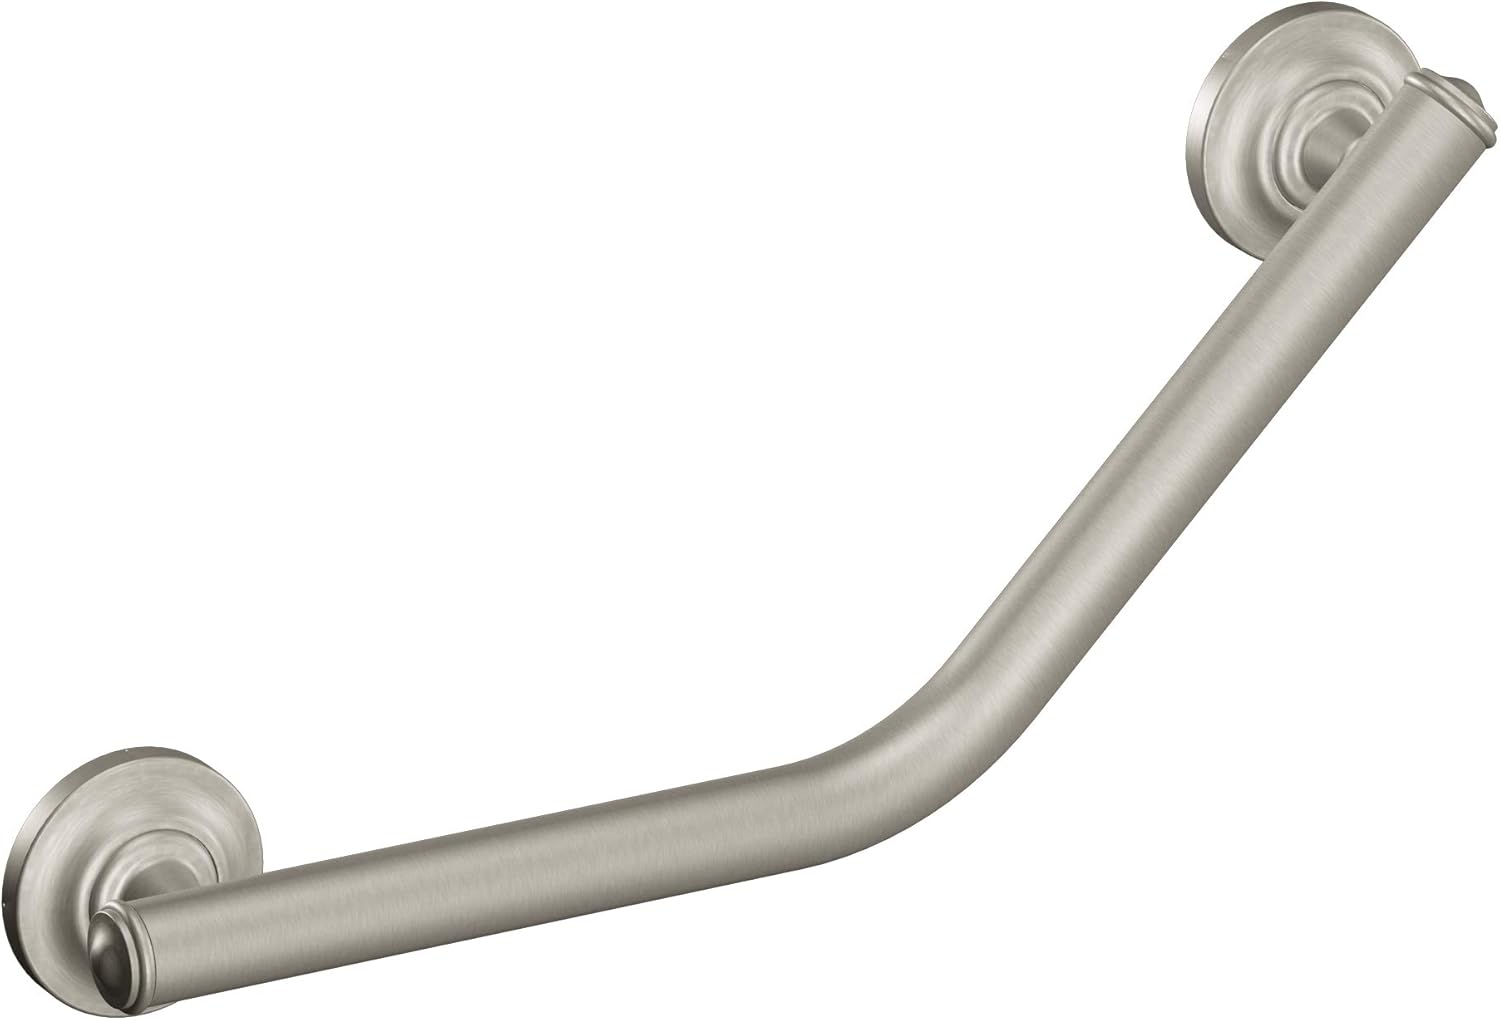
Corner Safety Bars

Corner grab bars are one continuous bar that provides safety protection when entering a corner or going around a corner. Corner bars also include angled bars and 90-degree angle bars, which are ideal for those who need both vertical and horizontal stability. These types of grab bars are also perfect for bathrooms that have an uneven wall surface but require contiguous stability.

Recommended Corner Safety Bar for Aging in Place:

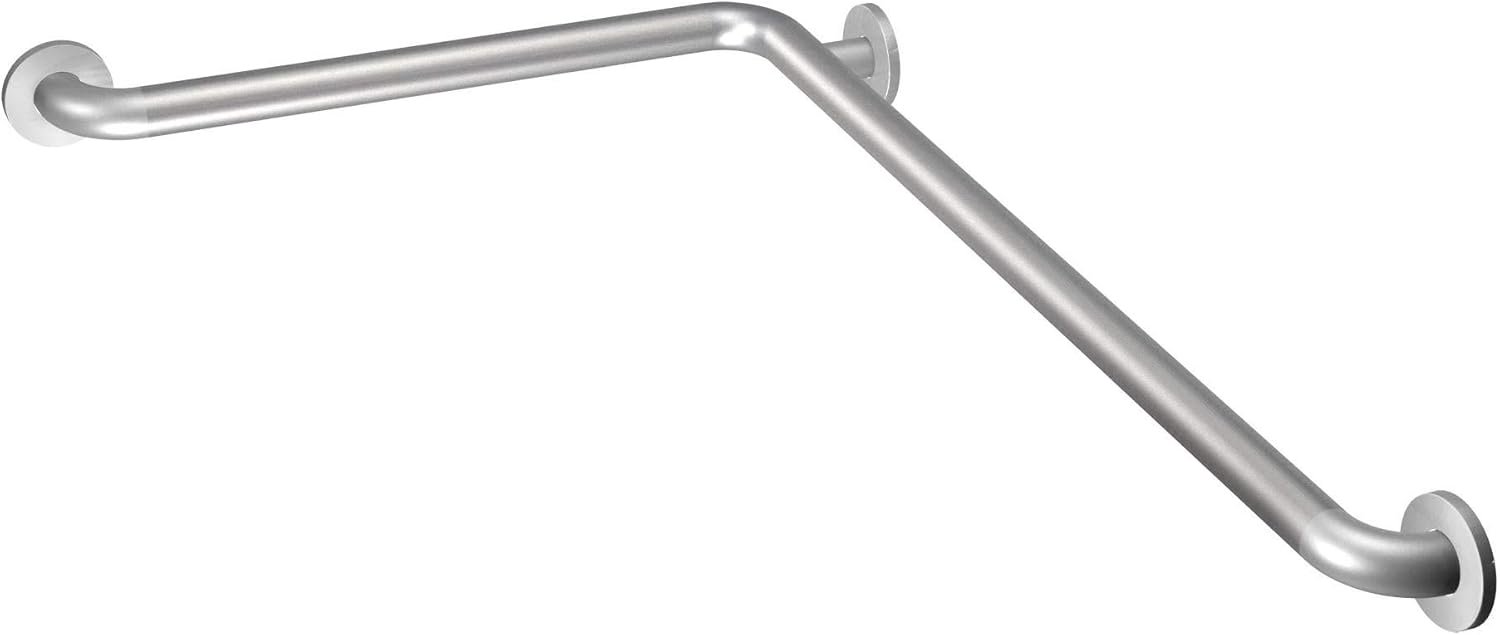
Moen L-Shaped Grab Bar
This long corner grab bar from Moen is solid and sturdy, supporting up to 500-lbs.

Moen Angled Grab Bar
Moen's angled grab bar is a great option for placing along the toilet or inside the tub for added support when standing up.

Floor-to-Ceiling Poles

Ideal for any room, adjustable height, floor-to-ceiling poles are especially effective for large bathrooms with open space. Because they use jackscrews to leverage tension, most floor-to-ceiling poles require ceilings and floors to be flat and level to remain stable and secure.

Recommended Floor-to-Ceiling Safety Pole for Aging in Place:

Stander Floor-to-Ceiling Grab Bar
This pole includes two points of contact along the ceiling and a curved section to make transitioning from sitting to standing easier for older adults.

Moveable Safety Bars

Moveable grab bars are hinged to the wall and may be positioned out of the way when not in use. They come in a variety of styles, and different options include swing-away bars that can be situated against the wall when not in use or flip-up or fold-down bars that can be hidden away for use only when needed. These types of bars are ideal for toilet areas where no adjacent wall exists or for multi-generational homes where stability fixtures are not required for every resident. When installed properly, moveable safety bars are just as ADA compliant as wall-mounted solutions.

Recommended Moveable Safety Bar for Aging in Place:

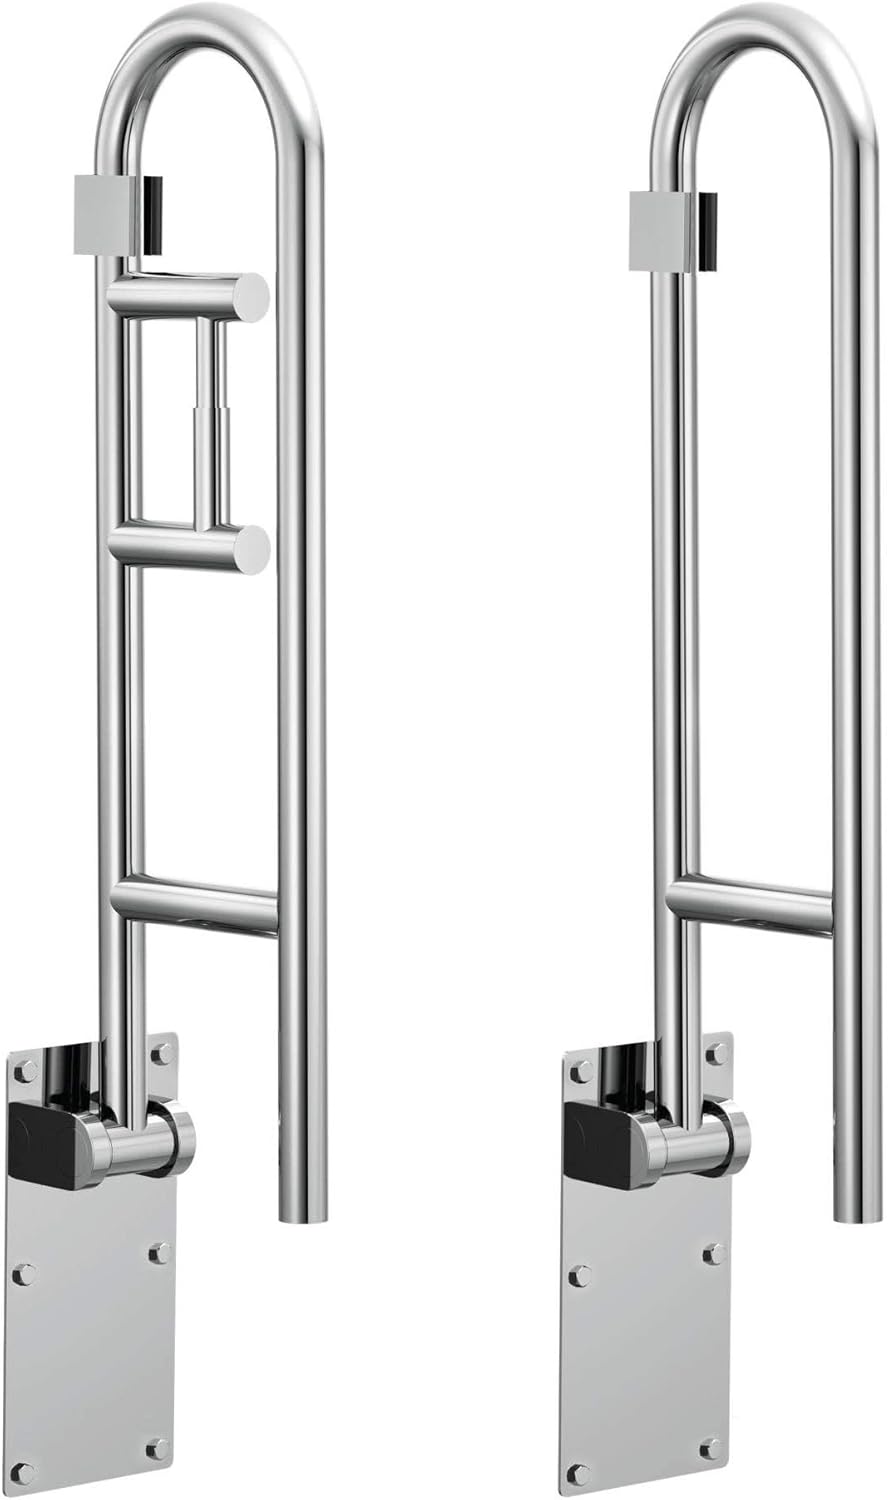
Moen Flip Up Grab Bar Set
This grab bar set is perfect to place on either side of the toilet with one side featuring a toilet paper holder for added convenience.

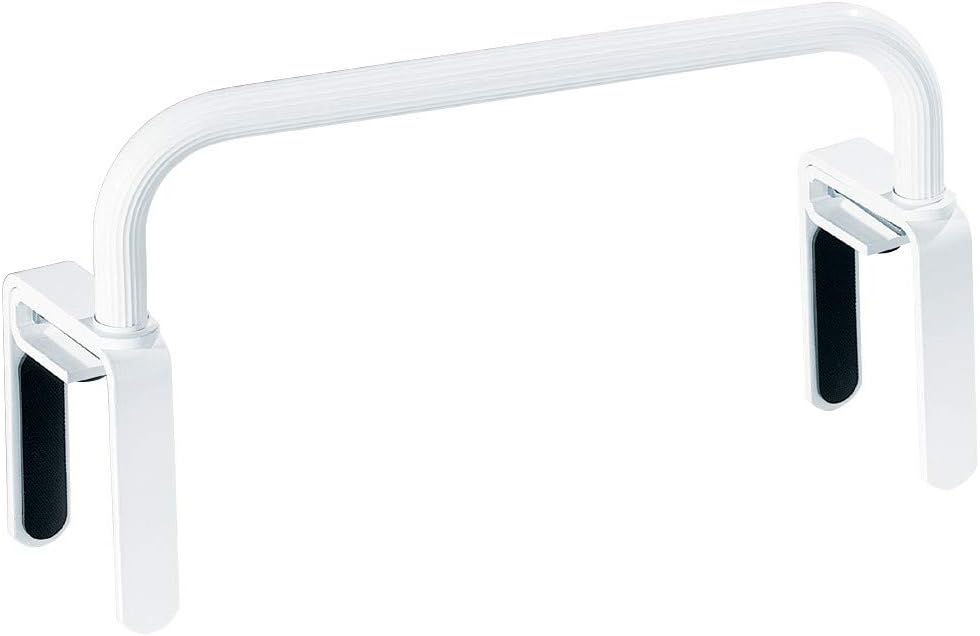
Bathtub Safety Handles

Bathtub safety handles clamp onto the edge of the tub for support getting in and out. While they are extremely versatile due to their adjustable height and single or multiple grasp areas, they are typicallynot suitable for fiberglass tubs.

Recommended Bathtub Safety Handle for Aging in Place:
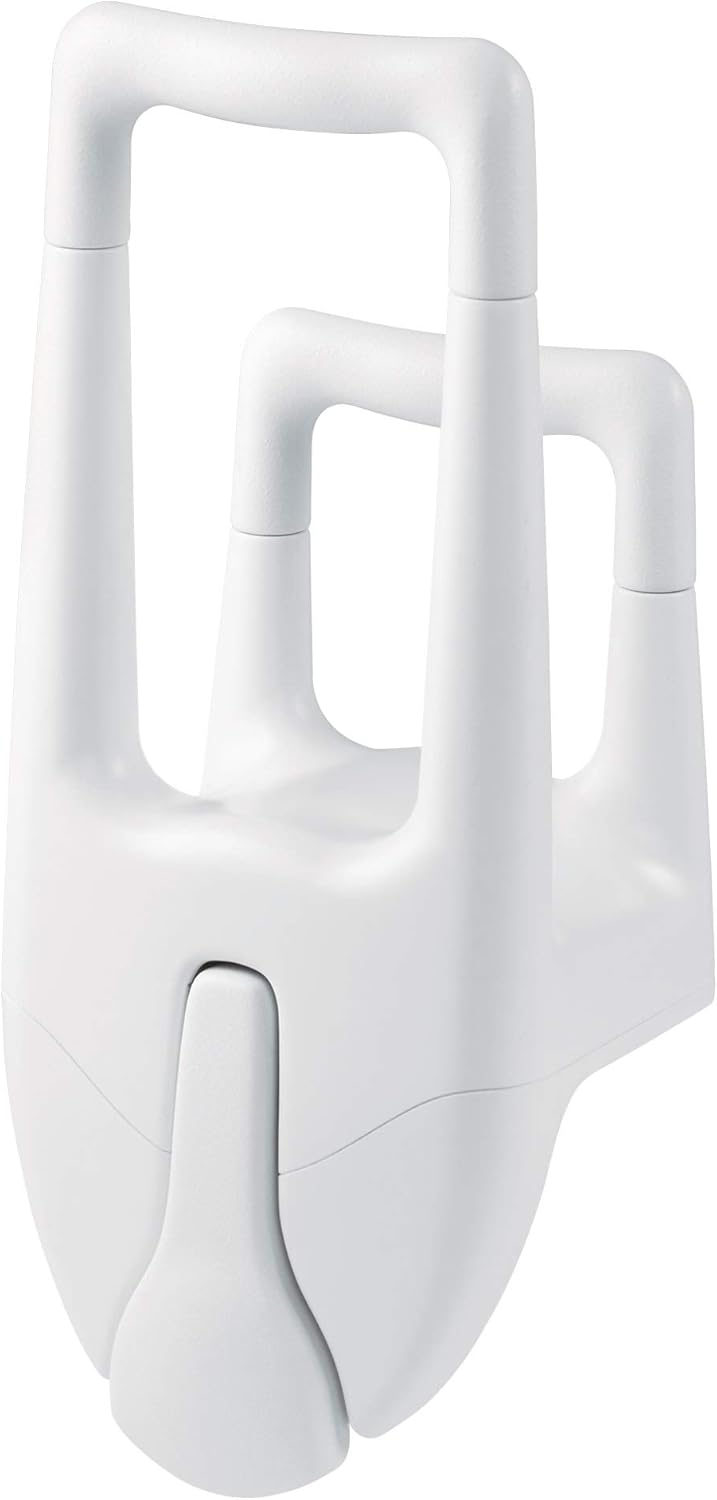
Moen Tub Grip
This sturdy dual tub grip has textured handles so gripping is easy even when the bar is wet.

Before You Begin

A Note About Installing Grab Bars in Fiberglass Tubs and Showers

Molded fiberglass tubs and showers are usually made of thinner and less supportive material and tend to have varying widths, spaces, and gaps due to their uneven surface designs. Attaching grab bars or safety handles directly to fiberglass is not recommended because the material is not typically strong enough to secure the weight of someone using the bar or handle in the event of a fall.

When installing grab bars or handles, most contractors will opt to modify an existing fiberglass tub or shower so they can secure the fixtures to a stud or mounting point behind it. While some fiberglass units contain reinforced material designed to handle the installation of safety fixtures, unless it is specifically labeled as meeting the appropriate ANSI load requirements, it is best to find a more stable mounting alternative.

A Note About Drilling into Ceramic Tile

Sometimes it's necessary to drill into or through ceramic tile to properly mount and secure a safety bar or grab bar. Ceramic tile in showers or above tubs cannot be drilled with regular bits. To bore holes for screw clearance, a masonry bit is required. While they are used just like regular bits, masonry bits have carbide tips that allow them to grind through masonry materials like ceramic tile without cracking them.

Where to Install Safety Bars in the Bathroom

You'll want to approach your safety bar installation from two perspectives. The first is identifying the ideal places in the bathroom to install grab bars and the next is understanding what's required from a building code perspective.

Here is some additional information to consider when it comes to bathroom danger zones:

Commode Area

Because commode areas differ from home to home—and even from room to room—there is no universal safety solution when it comes to safety bars or handrails. Some commode areas have no adjacent walls and will require a swing-away or flip safety bar unit. Other commode areas are more conducive to traditional bars. For ideal conditions, where a wall is adjacent to the toilet:

  • Install along horizontal safety bar about five to six inches above the toilet seat on the nearest wall. The grab bar should measure 32 inches or longer and extend 12-plus inches past the front of the toilet, providing plenty of bar support for lowering and raising.
  • Position a second vertical safety barperpendicular to the far end of the horizontal grab bar and extending about 16-plus inches above it. This will ensure stability when standing.

Showers and Tubs

You should never have to stretch to get from one grab bar to another. Whether you have a full bathtub or a stall shower, follow these guidelines when installing safety bars.

Shower/Tub Combos

When it comes to safety bars in shower and bathtub combinations, there should always be a bar within reach.

  • Install avertical entrance bar on the wall opposite of the faucet wall (typically to the rear of the shower or tub).
  • Install a secondvertical grab bar on the faucet wall.
  • Install a longhorizontal safety bar (or even two bars) to the side wall to ensure you'll have a bar to grab onto anywhere in the tub. This will also assist you when stepping into and out of the tub. Position the top horizontal grab bar about 36 inches from the floor of the tub. If you're including a second safety bar, install it about six inches below the top bar.
  • Consider installing a bathtub safety handle that slides over the side of the tub and is held in place with a clamp. This is helpful whether you're taking a bath or a shower and if you need extra support and security when stepping into and out of the tub. Another option is a tub safety grip bar.

Additional Tub Safety Grip Product Suggestions:

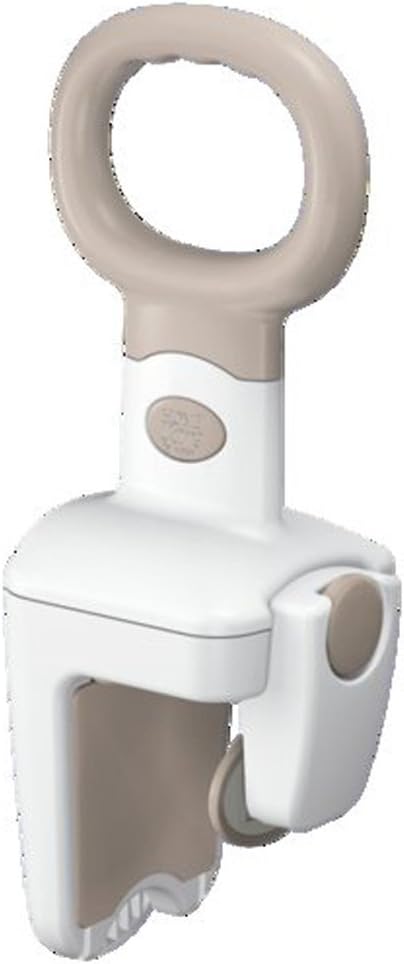
Moen Home Care Tub Grip
Its large suction pads clamp on tightly. Its handle is ergonomic with great anti-slip properties.

Moen Home Care Tub Safety Bar

This tub safety bar is a different take on tub safety and gives even more area to hold onto when getting safely into the bathtub.

Stall Showers

Stall showers (which contains only a shower and no tub) may be easier to enter and exit, but they are still dangerous for those with stability issues. There should always be a means of support for entering and exiting a stall shower, as well as for the duration of the shower. To ensure your safety:

  • Install avertical safety bar inside both of the shower door jambs. The vertical grab bar helps you stay steady going from the bathroom floor to the shower floor and eases the transition when its necessary to step up and over the lip of the shower threshold.
  • Inside the shower, two or more grab bars are recommended:
  1. Install at least one horizontal safety bar on the side wall. You should be able to hold onto the entry bar, then easily reach the horizontal bar inside the shower.
  2. Install a vertical safety bar next to the faucet handles, so you can adjust water temperature, the showerhead, and water flow without losing your balance.

A Few Notes About Grab Bar Positioning

The Angle

How a grab bar is installed-whether horizontally or vertically—has a lot to do with how it will be used and the specific needs of the person using it. Each option has its pros and cons. For example,vertical safety bars are easier to grip for those with arthritis but provide less wall coverage.Horizontal safety bars may be more uncomfortable for those with tender or swollen joints, but they make it easier to move up and down from a wheelchair, toilet, or tub.

Diagonally positioned grab bars would seem to be the answer—they provide more coverage area, they're not as painful to grip for those with osteo or rheumatoid conditions, and they can accommodate different heights. However, diagonally positioned safety bars can make it easier for your hand to slip when gripping the bar, and, depending on the angle, it may not provide the same leverage for sitting and standing. The proper angle for a diagonally situated handrail is 45 degrees, and we recommend a minimum length of 24 inches.

The Clearance

In addition to the angle of the grab bars, you'll want to make sure they are free from any obstructions and have enough clearance to provide effective support once they're installed. This seems obvious, but it often goes overlooked.

Fixed-mount support bars should be installed only after proper measurements have been taken and the final layout of your bathroom has been determined. They'll need to be clear of wall-mounted shelves and faucets, as well as shower, tub, and sink handles. Other fixtures, such as paper dispensers and mirrors should be a safe distance from the safety bars, as should free-standing protrusions, such as hampers and shelving units.

Suction Cups vs. Fixed Safety Bars

Most safety bars are affixed to bathroom walls with suction cups or permanent mounting fixtures. While safety bars that clip to the side of the tub basin are helpful, they should not be used as your only source of stability protection. That leaves fixed-mount grab bars or safety bars with suction cups as the only truly safe alternatives.

So, which choice is right for your bathroom? This can depend on a variety of factors. As previously mentioned, suction cups may be the only viable option if there are restrictions on the modifications that can be made to the bathroom. Other factors might be the level of need. If you need to place all your weight on the bars, fixed-mount bars are probably best. If you only need them for balance and aren't worried about falling, suction-cup grab bars might be the quicker and more convenient solution.

While aesthetics is of course important, it shouldn't take priority over need. Decide what level of support you're going to need now and in the future, and let that determine your decision-making. Take aesthetics into consideration only after you've decided which option is best for your safety.

Advantages of Suction-Cup Safety Bars

  • Easier for Do-It-Yourselfers (DIYers): As long as you do not have health limitations that prevent you from properly positioning the bars into place, suction-cup safety bars are simple to install.
  • Adjustable and removable: If you don't like the placement or your needs change over time, suction-cup safety bars are easily adjusted and removed.
  • Compact and portable: Most suction-cup safety bars can be easily packed and placed in some (though not all) hotel bathrooms while you travel.
  • Cost: Most suction-cup grab bars are cheaper than their fixed-mount alternatives and may not require you to hire a contractor.

Disadvantages of Suction Cup Safety Bars

  • Surface limitations: For the most part, suction-cup grab bars are only suitable on nonporous and flat surfaces. They cannot be used over grout lines, on small tiles, or on textured or porous tile. They should never be used on drywall.
  • Not as secure for bearing weight: Before purchasing, check websites and packaging for disclaimers. If the purpose is to fully bear all your weight on a safety bar, suction-cup bars are not typically the best choice.
  • Require frequent inspection: You should check the stability of your suction-cup bars before every use to ensure they are safely secured and sturdy enough to help you maintain stability. Over time, their suction will weaken, and they'll need to be replaced.
  • Fewer options: While there are plenty of aesthetically pleasing suction-cup safety bars, they typically don't offer as many material types, varieties, or styles.

Advantages of Fixed Safety Bars

  • Strength and durability: Fixed-mount safety bars are meant for body leveraging as well as balance assistance. This is an extremely important factor to keep in mind for both your immediate and future needs.
  • More options: Fixed-mount grab bars offer more styles, shapes and materials than suction-cup bars also come in acrylic and metal with a wide variety of colors and finishes to choose from
  • More functionality: Fixed-mount safety bars can be installed contiguously in or around corners, they can flip up or down or swing away for when they're not needed, and they can serve other purposes, such as shelving for toiletries or holders for towels. Suction-cup grab bars are not as versatile.

Disadvantages of Fixed Safety Bars

  • More difficult for DIYers: For the best and safest installation, fixed-mount safety bars require more advanced skills when it comes to home modifications.
  • Not adjustable or removable: Once they are installed, fixed-mount safety bars cannot be adjusted or removed without additional drilling and patching. For this reason, some people opt to use a suction-cup safety bars temporarily before permanently installing a fixed-mount grab bar.
  • Cost: Fixed-mount safety bars tend to be more expensive due to higher quality material and professional installation costs.

Safety Bar Materials and Features

When it comes to bathroom safety for aging in place, aesthetics matter, but not as much as functionality. Once you've identified your needs and the features your safety requires, you can start looking for the color, style, and material that matches your décor.

Look for these features in bathroom safety bars:

  • Slip resistance
  • Textured handles for better grip
  • Corrosion resistance
  • Minimum diameter of at least 32-38 mm
  • Weight load of 300-500 pounds

Safety bars come in a variety of materials, colors, and styles, but they may not be available for every type. Common varieties include:

  • Solid 304 stainless steel (will not rust)
  • Stainless finish
  • Acrylic
  • Nylon
  • Powder-coated stainless steel

Professional Installation or Do It Yourself?

Bathroom safety bars play an extremely important role in the aging-in-place home—keeping you safe. Wet showers and slippery floors present significant fall hazards for even the most well-balanced and steady homeowner. Making sure your grab bars are installed properly is of paramount importance, regardless of whether you choose suction-cup styles or fixed-mounted ones.

Before making a final decision on location, type, material, or position, a good piece of advice is to reach out to a Certified Aging in Place Specialist (CAPS) contractor to gather some information about what's best for your unique situation. CAPS contractors can help in other ways, too.

A CAPS contractor can:

  • Purchase safety bars, poles, and mounting equipment directly from trusted manufacturers, saving you money
  • Provide worry free installation, giving you the peace of mind of having stable, dependable bathroom grab bars that are always within reach
  • Return to remove, adjust, or replace a safety bar, taking care to minimize the impact the modifications have on your bathroom walls
  • Provide advice and guidance about other safety hazards you may have in your home outside of the bathroom.

As a general rule, you should be wary of undertaking any projects that could lower your property value or result in serious injury. While installing suction-cup handrails may not pose much of a danger in either scenario, using improperly installed safety bars could result in injury or even death.

The same holds true for fixed-mount safety bars; if not properly installed, using them can be dangerous. Likewise, fixed-mount bars can be complicated to install, require special equipment, and could result in significant damage to your bathroom if the installation is not carried out correctly.

In both cases, consulting a CAPS contractor is your best bet. Even if you choose to install the bars yourself, at least you'll have a professional's opinion about where to locate the bars and what is best for your particular situation.

You have a ton of choices when it comes to bathroom safety bars. As you continue to do your research to determine the right safety bars for your aging-in-place bathroom, send me any questions you have using the comments section below. I'm here to help guide you through the process.

Good luck with your next aging-in-place remodel!

Handicap Bathroom Bars

Source: https://aipcontractor.com/the-ultimate-guide-to-bathroom-safety-bars-for-aging-in-place/

Wet Area Bathrooms

Wet Area Bathrooms

A wetroom can undeniably add a wow factor to your home giving it a stylish, contemporary look. The latest wetroom designs are fast becoming 'must haves' with home owners keen to introduce a sense of luxury to their newly renovated bathrooms. But, can we believe the hype? Here we weigh up the pros and cons to help you decide if a wetroom is suitable for your home.

The pros

1. A wetroom provides an accessible shower for children and those with mobility problems.

One of the biggest benefits when it comes to wetrooms is accessibility. For anyone who may have trouble getting in and out of the bath or shower, wetrooms can be a liberating, luxurious solution to bathing difficulties. With no shower tray, it's simply a case of walking in and out, as a wetroom's floor is level and slip-resistant throughout.

Disabled access bathroom & luxury wetroom in Oxshott

2. A wetroom is hugely practical.

Not only does a wetroom look fantastic in sleek, contemporary bathrooms, it's also practical. For the simple fact that there is very little to a wetroom, meaning they are incredibly easy to clean.

3. A wetroom maximises your design opportunities

By removing the bath you are maximising your space and opening up the room. There is also no need for a bulky shower enclosure with doors that may intrude upon what little space you already have.

The available space can be transformed into something distinctly stylish that turns the necessity into a luxury. Wetrooms can be any size or shape and offer the option of using exciting new products, from exhilarating wide rainfall shower heads to showers that feature a variety of different water options, lights and even music. Why not speak to our design team about what's possible?

Design-wise, contemporary wetrooms have the potential to be extraordinarily elegant and can complement the aesthetic of the modern home. Due to the minimalist nature of the design, wetrooms can feature varied materials such as wood, stone and concrete. Allowing your creativity to run wild.

4. A wetroom can increase the value of your home

A wetroom as a second bathroom is a feature which buyers are increasingly looking for.

"Adding a new bathroom to your home will add an extra 2.88% to the value of it, a wetroom is likely to add even more."

suggests Phil Spencer, best known for Location, Location, Location.

Wetroom Designed & Installed in Thames Ditton by Bathroom Eleven

The cons

1. Everything could get very wet

The fact that the shower is no longer housed in something, it is somewhat inevitable that the whole room could get wet when in use. This can make it tricky to keep things like towels, toilet paper and any other soft furnishings dry. But don't worry, we have some very clever design ideas to overcome this challenge. We will design the space so that everything doesn't get soaked every time someone has a shower.

Wet room in Long Ditton - Bathroom Eleven

2. Wetrooms can get steamy and damp

Dampness in a wetroom can be a problem especially if your wetroom is small. However, you can easily overcome this with good ventilation and an extractor fan.  Wetrooms are designed to be completely waterproof. A process called 'tanking' is used, where all of the walls and floor are treated with a special tanking system and then tiled. This essentially creates a completely waterproof box ensuring any moisture won't escape into the rest of the house.

3. Wetroom floors get wet and slippery

This is in fact a myth – a wetroom's floor is level and special slip-resistant tiles are used throughout. This means that wetroom floors are actually safer than conventional bathroom floors.

We will be happy to advise you. We have completed a vast array of wetroom projects and are rapidly becoming the go-to specialists for wetroom design in Surrey and surrounding areas.

Why not speak to our designers to understand all the options and the perfect wetroom solution for your home? We will work with you to create a wetroom that reflects the rest of your home or a statement contrast in pattern, colour or texture.

Meet the Bathroom Design Team

Wet Area Bathrooms

Source: https://bathroomeleven.co.uk/what-are-the-pros-and-cons-of-a-wetroom/

Half Bathroom

Half Bathroom

half-bathroom-ideas

ALEC HEMER

Your half bathroom is probably one of the smallest spaces in your house, but that doesn't mean it's the easiest space to decorate. Because it's frequented by company, you want it to look as nice and inviting as the other not-so-common areas in you're home, but you're unsure what to do and where to start. Relax! Look at this small space as a design challenge—a compact space that can be the perfect testing ground for all those new design ideas you've been itching to try.
The possibilities are endless. You can spruce up a boring space with one of these bathroom paint colors or make a bold statement with these cool and whimsical ways to add wallpaper to your bathroom. The makeover doesn't have to take forever! Even if you're looking to overhaul your half bathroom from top to bottom (via bright bathroom lighting ideas or cool bathroom tile ideas) the space is small, so the transformation will happen relatively quickly . From there, you can take on some projects involving small-bathroom storage ideas and more general bathroom organization ideas. With a little love—and a lot of moxie—this small space may become your new favorite room in the house!

map-wallpaper-half-bathroom-ideas-country-living

LAUREY W. GLENN

1 of 20

Worldly Wallpaper

Inspire your guests' next vacation by covering the walls of your half bathroom with map-inspired wallpaper.

wooden-cabinets-half-bathroom-ideas-country-living

Emily J Followill

2 of 20

Z-Brace Yourself

Fresh paint colors lighten up the half bathroom in this rustic barn that features Z-brace style lower cabinets.

skirted-vanity-half-bathroom-ideas-country-living

DAVID TSAY

3 of 20

Dressed Up Digs

Add a feminine touch to your farmhouse half bath by hanging a ticking stripe fabric skirt below your vanity.

all-white-half-bathroom-ideas-country-living

CODY ULRICH

4 of 20

All-White Washroom

There's no question that your half bath is clean when the walls, sink, toilet, and tile are this bright white!

floral-wallpaper-half-bathroom-ideas-country-living

DAVID A. LAND

5 of 20

Pretty Powder Room

The ultimate recipe for a springy half bathroom? Floral wallpaper, a distressed turquoise chest, and a vintage brass mirror.

vintage-side-table-half-bathroom-ideas-country-living

ALEC HEMER

6 of 20

Storage on the Side

Add extra storage to your half bath with a vintage rolling cart that can house toiletries, towels, and more.

navy-half-bathroom-ideas-country-living

DANA GALLAGHER

7 of 20

Blue Ribbon Bathroom

A navy paint finish on reclaimed wood walls and a vanity base creates a cozy half bathroom that's more sultry than stuffy.

neutrals-half-bathroom-ideas-country-living

Christopher Sturman / trunkarchi

8 of 20

Warm Neutral Washroom

Off-white subway tiles, a beige storage cabinet, and cream-colored wall art soften up the space in this half bathroom.

hot-pink-tin-cabinet-half-bathroom-ideas-country-living

JAMES MERRELL

9 of 20

Punchy Purple

For small space half bathrooms, add storage outside the room, like these bright purple cabinets that feature punch tin doors.

gray-half-bathroom-ideas-country-living

HARIS KENJAR

10 of 20

Plant Privacy

A big open window lets lots of natural light into this half bathroom, while an oversized bush outside keeps things concealed.

green-wallpaper-half-bathroom-ideas-country-living

JOHN ELLIS

11 of 20

Fresh Green Finishes

A repurposed chest and vintage oil portraits pop against bright green wallpaper in this quirky half bathroom.

vintage-neutral-half-bathroom-ideas-country-living

Brian Woodcock

12 of 20

Stand-Out Sink

Swap a pedestal sink for a utility sink to add a rustic touch to an otherwise shabby chic half bathroom.

 quilted-wallpaper-half-bathroom-ideas-country-living

Eric Piasecki

13 of 20

Cozy Quilt

Keep your half bathroom country and cozy by displaying a red-and-white quilt as a wall covering in an otherwise overlooked space.

repurposed-sink-half-bathroom-ideas-country-living

Annie Schlechter

14 of 20

Renovated Restroom

Fun printed tiles and a new vessel sink add modern touches to this half bathroom without stripping away its country charm.

industrial-half-bathroom-ideas-country-living

SARAH ELLIOTT

15 of 20

Black & White & Red All Over

This half bathroom feels crisp and clean with a black bucket-style sink, sailor-inspired stripe wallpaper, and pops of red from the pendant light and storage stool.

soda-storage-half-bathroom-ideas-country-living

mark lohman

16 of 20

Salvaged Soda Storage

Repurpose a vintage soda cooler cart into a fun half bathroom decorating idea by adding plumbing and a wall faucet.

reclaimed-half-bathroom-ideas-country-living

WYNN MYERS

17 of 20

Weathered Washroom

Almost everything in this distressed half bathroom is reclaimed—from the wooden walls to the bucket-style sink.

wall-sconces-half-bathroom-ideas-country-living

JUSTIN BERNAUT

18 of 20

Spruce It Up

Graphic patterned wallpaper and large brass wall sconces make this half bathroom feel so much more sophisticated.

quirky-mirror-half-bathroom-ideas-country-living

BRIAN WOODCOCK

19 of 20

Mixed Materials

A shiplap wall, a wood-rimmed mirror, and a concrete sink: The only thing these items have in common is how great they look together.

urn-sink-half-bathroom-ideas-country-living

Helen Norman

20 of 20

Urn Your Stripes

A floral-inspired powder room goes the extra mile by replacing a plain pedestal sink with a stone garden urn.

Half Bathroom

Source: https://www.countryliving.com/home-design/g31081734/half-bathroom-ideas/

Fashion

Sport

Hotels

banner